Filling Oil Reservoir
 | To avoid severe burns when pouring hot oil into vat, wear personal protective equipment (PPE) and take care to avoid splashing. |
| The oil level must always be above the heating elements and at the proper oil level indicator on the rear of the vat. Failure to follow these instructions may result in fire, severe burns, and/or damage to the fryer. |
 | Use high quality liquid frying oil in the open fryer. Some low grade oils have a high moisture content which causes foaming and boiling over. |
| To avoid personal injury and fire, ensure that oil completely covers heating elements |
Do not bypass the Melt Cycle. The type of oil being used in the fryer determines the amount of heat applied during the Melt Cycle. If the controls are set to the Solid setting, less heat is applied to the solid oil than if the controls were set to Liquid. Too much heat applied to solid oil causes much smoking, and could cause a fire. Match this setting to the type of oil being used at the time. When using new solid oil, it is recommended to melt the solid oil on an outside source before placing oil in the vat.
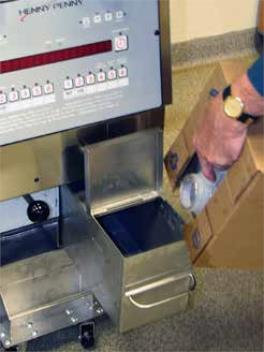
During the morning start-up procedures, or when the control displays E-1 and an alarm sounds, fill the auto-fill oil reservoir.
- Open door, pull reservoir forward and open reservoir cover.
- Pour oil into reservoir up to fill lines on the inside, and then close cover and push reservoir back into position.
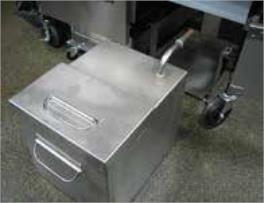
Removing and Cleaning Reservoir
Remove and clean the reservoir during the monthly cleaning.
- Open door and pull reservoir forward.
- Lift-up on reservoir, disengaging the reservoir from the slotted key-way.
- Clean reservoir at a sink with soap and water.
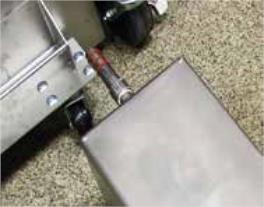
Check and Replace the O-rings
Before placing the reservoir back into position, lubricate the o-rings (below) on the filter tube with cold oil.
- Check o-rings for tears or nicks and replace if necessary.
- To replace o-ring, use a small, flat-bladed screwdriver, pry up on the o-ring and pull off of end of tube.