|
|
|
Adding or Modifying a Product Menu Item
Each product must be configured here for use in the GO menu. Use McDonald's approved and tested values to complete entry of every product held in the UHC. From the product screen, complete the following steps to delete, add, or modify a product menu item. Navigation: Home > Recipe Book > Product. See Operating Controls.
NOTE:
-
The UHC 600 comes preset with basic product menu items. Verify these align with product settings for your region.
-
A maximum of 60 individual products can be entered into the control. The Plus (+) sign, to add product, dims when the limit is reached. Removing (deleting) existing products, allows additional products to be added.

|
Tap the Lock icon to unlock editing. A password screen displays. Type 1122, and then tap the Green Checkmark to continue, or Back arrow to exit without making a change. When finished, tap the Lock icon to lock editing. |
- Select a group from the list on the left. The selected group displays blue to indicate it is active. NOTE: See Editing the Group Menu to add, modify, or delete a group.
- Tap Add (Green Plus), or Modify (Pencil Icon) to add or change a product menu item as applicable. NOTE: The following example is how to ADD a product.
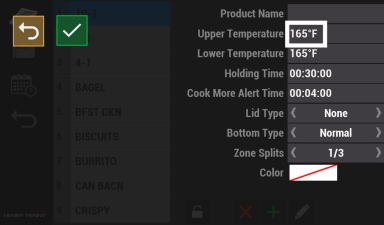
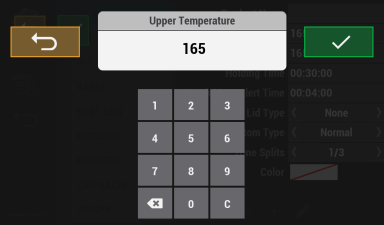
- Tap the field to add or change value. The Value screen displays. NOTE: Fields and values are examples, yours may vary.
- Tap the key pad to select the value. Product items parameters includes:
-
Product Name
-
Upper Temperature: must match lower
-
Lower Temperature: must match upper
-
Holding Time: total time before disposal. Follow McDonalds food safety guidelines.
-
Cook More Alert Time: notice to cook more product before disposal
-
Lid Type: type of tray lid or none
-
Bottom Type: type of tray, wire, or other
-
Zone Splits: one to three bins wide on a single shelf. The width and number of trays or wire baskets used per shelve. As an example, one wide tray verses three narrow baskets.
-
Color: unique timer color, the default is green.
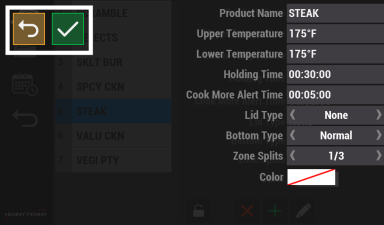
- Tap the Green Checkmark to continue, or the Back arrow to exit without making a change. The Item screen displays.
- Use steps 3 thru 6 to add each value to the menu item.
- When finished, tap the Lock icon to lock editing.

Deleting a Product Menu Item
Complete the following steps to delete a menu item.
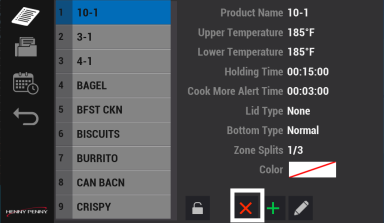
- Tap a menu item to delete.
- Tap the Delete (Red X) icon to delete a menu item. Delete Product displays with the Product Menu item name.
- Tap the Green Checkmark to continue, or the Red X to exit without making a change. A confirmation screen displays.
- Tap the Green Checkmark to continue. The Product Item is deleted. The Product Item screen displays.