Discarding the Oil
Manual Discard Using Oil Discard Shuttle

|
With prolonged use, the flashpoint of oil is reduced. To avoid personal injury or property damage, do not use oil that is foaming or shows signs of excessive smoking. If the oil temperature exceeds 420°F (216°C), immediately shut off the power at the main circuit breaker and have the fryer repaired. If oil temperature exceeds its flash-point, fire will occurs, resulting in severe burns and/or property damage. |
|
|

|
-
Open the door, lift-up on the filter pan stop and pull-out the filter pan assembly, using the handle on the filter pan.
-
Press and hold either filter button until “*FILTER MENU*”, along with “1.EXPRESS FILTER?” displays.
-
Press and release ► button until “6.DISPOSE AND CLEAN-OUT” displays.
-
Press “✓” button and “IS DISPOSAL UNIT IN PLACE” “YES NO” displays.
-
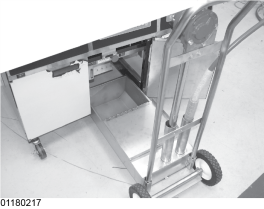
With discard shuttle rolled into place, press “✓” button and “OPEN DRAIN” displays. Pull out on drain knob to open drain and “DRAINING” displays. Oil now drains from the vat into the shuttle.
-
Display shows “CLEARING OLD OIL FROM OIL LINES” followed by “VAT EMTY” “YES NO”. Verify that vat is empty, and press “✓” button.
-
Display shows “REMOVE DISPOSAL UNIT AND INSERT EMPTIED FILTER PAN”. Remove disposal unit and empty in waste oil containers. From the filter pan assembly remove the crumb basket, retaining ring, filter pad and metal screen and take to sink to be cleaned. Return the empty filter pan and lid to the fryer, making sure it is pushed into placed and the latch engaged.
-
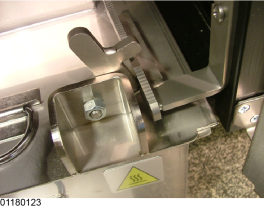
Press “✓” button and “CLOSE DRAIN” displays. Push-in on drain knob (Figure 5) to close drain and “SOLUTION ADDED?” “YES NO” displays. Fill vat to top fill line with hot water and add cleaning chemical.
-
Press “✓” button and “START CLEAN” displays.
-
Press “✓” button, “CLEANING” displays. Solution heats to 91° C (195° F) for 20 minutes.
-
5 minutes before end of cleaning cycle, “SCRUB VAT” displays and control beeps. Using the scrubbing/L-shape brush, scrub the inside of the vat and elements.
-
At the end of the 20 minutes, “CLN DONE” displays and beeps. “IS filter pan EMPTY?” displays. Check pan to confirm it is empty.
-
Press “✓” button and “REMOVE SOLUTION FROM VAT” displays.
-
Pull the drain knob to drain solution into filter pan. “DRAINING” displays.
-
Press “✓” button and “CLOSE DRAIN” displays. Push-in on drain knob in to close drain.
Proper Element Lift Technique
-
“FILL VAT WITH CLEAN COLD WATER” displays. Press “✓” button and “LIFT ELEMENT” displays and control beeps. Remove basket support and use the lift tool to lift the element from the vat.
-
Press “✓” button and “ELEMENTS CLEANED?” displays. Use a brush to clean the underside of elements.
-
Press “✓” button and “LOWER ELEMENT” displays and controls beep. Lower the element and replace the basket support.
-
Press “✓” button and “CAUTION” “IS filter pan EMPTY?” “YES NO” displays. Empty the filter pan and push back in position.
-
Press “✓” button and “*OPEN DRAIN*” displays. Pull out on drain knob to open the drain and “DRAINING” displays. Water now drains from the vat into the filter pan. “CLOSE DRAIN” displays. Push the drain knob in to close valve.
-
Press “✓” button and “RINSE VAT WITH HOT WATER” displays. Pour hot water into vat and rinse vat.
-
“CAUTION” “IS FILTER PAN EMPTY?” “YES NO” displays. Empty filter pan and push back in position.
-
Once filter pan is in position, Pull the drain knob. “DRAINING” displays
-
“CLEARING SOLUTION FROM OIL LINES” followed by “VAT DRY?” displays. Thoroughly dry the vat first with a dry cloth and then with paper towel. Ensure to dry the inside of the drain opening and underneath the fin at the back of the vat.
-
Press “✓” button and “CLOSE DRAIN” displays. Push-in on drain knob in to close drain.
-
“MANUAL FILL VAT”, followed by “IS VAT FULL?”, “YES NO” displays. Fill the vat with fresh oil to the lower fill line.
-
Press the “✓” button and controls return to normal operations.