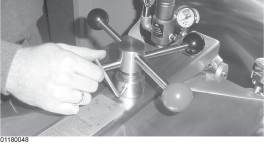
Adjusting the Limit Stop
To extend the life of the lid gasket and help prevent steam leakage, check the limit stop adjustment quarterly, following the steps below.
-
Close and latch lid, and turn spindle counterclockwise until it stops.

-
Using a 3/16 inch Allen wrench, loosen the 2 set screws on the outer collar of the limit stop.

-
Turn the inner collar clockwise until it stops.
NOTE: Insert a small screwdriver or Allen wrench in the hole in the inner collar to assist you in turning the collar.
-
Turn the spindle clockwise until it stops. The lid gasket is now touching the vat rim.
-
From the front of the fryer, turn the spindle at least 3/4 of a turn , but not over 1 full turn. One of the spindle arms should be lined up with the red ball of the latch, at this time.
-
Slightly turn the spindle past this position, so it should show in about the 7 o’clock position.”
NOTE:
-
The 7 o’clock position is only to allow slight additional turning of the spindle to relieve any side pressure against the locking pin. Side pressure holds the pin in the locked position, even after all the pressure has released.
-
When adjustment is complete, if a black ball on the spindle is lined up with the red ball on the latch, unscrew the black ball and the red ball on the spindle and change places in the spindle. The red ball on the spindle should now line up with the red ball on the latch.
-
-
Turn the inner collar counterclockwise until it stops against the bottom hub of the spindle.
-
Tighten Allen screws.
NOTE: If the lid cover fails to seal properly, steam escapes from around the gasket during frying. Readjust the limit stop, this time turning the spindle 1 full turn after the initial contact of the lid gasket with the vat rim. See step 5 above.


