|
|
|
Changing the Filter Envelope
The filter envelope should be changed after 10–12 filter cycles or whenever it becomes clogged with crumbs. Proceed as follows:
-
Move the main power supply switch to the off position.
-
Remove and empty the condensation drain pan.

Burn Risk
Use protective cloth or glove when disconnecting the filter union or severe burns could result. If the filter pan is moved while full of oil, use care to prevent splashing, or severe burns could result.

-
Disconnect the filter union and remove the filter pan from under the vat. If available, a filter pan may have casters under it, allowing easy transport of filter pan and filter assembly.
-
Lift the screen assembly form the filter pan.
-
Wipe the oil and crumbs from the filter pan. Clean the filter pan with soap and water, then thoroughly rinse with hot water.
-
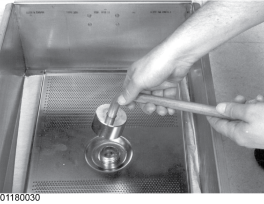
Unthread the suction standpipe from the screen assembly.
-
Remove the sealer bar and discard the filter envelope.
-
Clean the top and bottom filter screen with soap and water. Rinse thoroughly with hot water.
NOTICE -
Thoroughly dry all filter pan components before assembly.
-
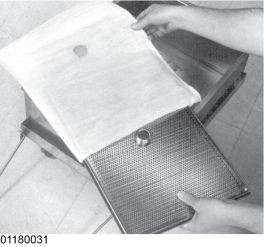
Assemble the top filter screen to the bottom filter screen and slide the screens into a new filter envelope.

-
Fold the corners in and then double fold the open end.
-
Clamp the envelope in place with the sealer bar.
-
Screw on the suction standpipe assembly.
-
Place complete filter screen assembly back into filter filter pan and slide pan back into place beneath the fryer.
-
Connect the filter union by hand. Do not use a wrench to tighten.
-
Slide the condensation drain pan back into place. The fryer is now ready to operate.