Preventative Maintenance
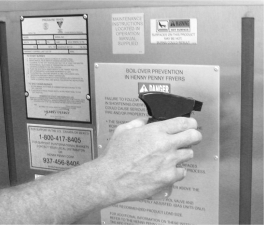
Cleaning Deadweight Assembly

|
To avoid severe burns, do not remove deadweight cap while operating fryer. |

|
To avoid personal injury:
|
|
|
The deadweight is not captive inside the steam stack and can fall out. Keep the steam stack in the upward orientation or the deadweight can fall out and may cause personal injury or damage to the deadweight. |

At the end of each day’s usage of the fryer, the deadweight assembly must be cleaned.

-
Turn the fryer must be off and safely release pressure.
-
Open the lid and then remove the deadweight valve cap and deadweight.
-
Wipe both the cap and deadweight with a soft cloth. Make certain to thoroughly clean inside cap, the deadweight seat, and around deadweight orifice.
-
Clean the exhaust tube with stainless steel brush (Henny Penny part number 12147).
-
Dry parts and replace right away to prevent damage or loss.
Cleaning the Nylatron Slides
- Spray biodegradable, food safe, foaming degreaser on Nylatrons.
- Raise lid up and down several times to spread the degreaser.
- Wipe Nylatrons to remove food soil, grease, and degreaser residue.
The lid rollers, in the back of the fryer, should be lubricated at least once a year, to allow the lid easy movement.
- Remove the back shroud of the fryer.
- Using spindle lube, part number 12124, place a small amount of lube on both top and bottom rollers. Ensure to lube both left and right rollers.
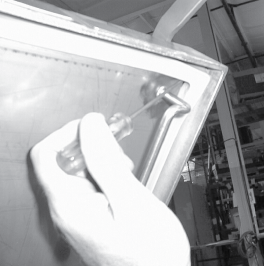
Reversing the Lid Gasket
|
|
To avoid personal injury, allow lid to cool before cleaning or removing the gasket.DO NOT REMOVE the gasket retainer screws or retainer to remove the gasket. Remove ONLY the gasket. Objects can fall and splash hot oil or hot water while performing this procedure. Cover the vat with a sheet pan or drain the vat and allow to cool otherwise serious burns may result. |
Reversing the lid gasket helps to prevent early failure of lid gasket and the loss of pressure during a cook cycle.
-
Raise the lid and remove racks and carrier.
-
Grasping the lid handle, lift the front of the lid up until it stops in an upright position.
-
Using a thin blade screwdriver, pry out the gasket at the corners. Remove the gasket.
-
Check the gasket for any tears or nicks. If the gasket is damaged, it needs to be replaced.
-
Clean the gasket and gasket seat with hot water.
-
Rotate the gasket with the opposite side facing out.
-
Install the 4 corners of the lid gasket. Smooth the gasket into place, working from the corners towards the middle of each side.
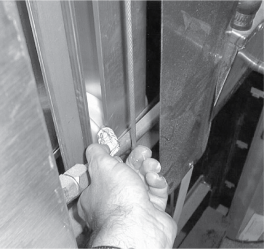
Cleaning the Safety Relief Valve
|
|
To avoid severe burns, do not tamper with safety relief valve while operating fryer. |
|
|
To avoid serious personal injury, do not tamper with safety relief valve. Tampering with this valve will void agency approvals and appliance warranty. |
This valve is factory preset to open at 14½ psi. (999 mbar).

Do not use a pipe wrench. Use thread sealant sparingly.
-
Use a wrench to remove pressure gauge.
-
Use a wrench to loosen the valve from the pipe tee, turn counterclockwise to remove.
-
Clean the inside of the pipe tee with hot water.
-
Immerse the safety relief valve in a soapy water solution for 24 hours. Use a 1:1 dilution rate. The valve cannot be disassembled It is factory preset to open at 14-1/2 pounds of pressure. If it does not open or close, it must be replaced.
-
Turn the safety relief valve towards the rear of the fryer when reinstalling the relief valve.
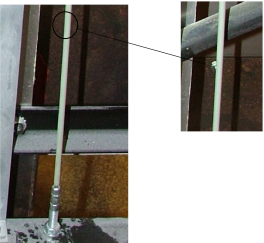
Inspect Counterweight Cables
|
NOTICE - |
If lid becomes difficult to operate, stop using the fryer and call for service. Cables need replaced. |
Henny Penny 8 Head fryers use two cables in the counter-weight mechanism that helps in the raising and lowering of the lid.
Cables should be visually inspected yearly, either as part of a planned maintenance program or during a routine service call. Cables more than 10 years old should be replaced regardless of inspection results.

- Using a 3/8” socket, remove the 6 keps nuts around the exterior of rear cover.
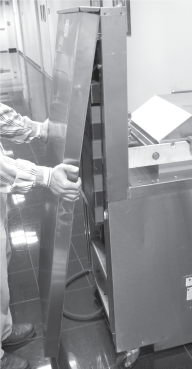
- Lift up on the rear cover and pull out at the bottom to clear threaded studs. (Removing top shroud makes it easier to remove the rear cover, but is not necessary.)
Counterweights with Cover Removed
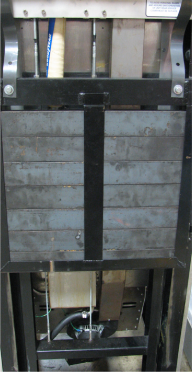
- Inspect the counter-weight cables. If cables have cracks in the jacket, missing pieces in the jacket, or other obvious signs of wear, call for service to have both cables replaced.
Example of acceptable lid cable.