Selecting the Location
Place the unit on a table, preferably with a cut-out opening below the cabinet to allow easy service connections and serviceability. When setting up the unit, be sure to level the table.
The unit has built-in draining capabilities, but this becomes ineffective when set on an unlevel table.
-
Place the counter warmer into desired location.
-
Ensure it is level.
-
Run a bead of silicone rubber (silicone or equivalent sealant must be a NSF listed material) around the perimeter of the unit sealing it to the surface. You are now ready to make the electrical and drain connections to the unit.
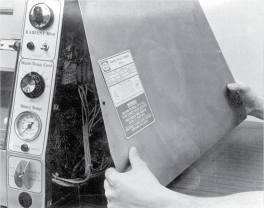
Removing the Control End Panel

-
Remove the seven screws fastening the end panel to the PANEL cabinet.
-
Slide bottom of end panel out first allowing top to drop below shelf edge.
Connecting the Water Drain
The drain can be connected to a 1 inch N.P.T. directly below the water well or to a 3/4 inch N.P.T. from the operator’s side. We recommend the 1 inch N.P.T. connection as this allows straight down draining of the water.
