-
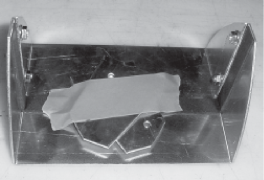
Remove nuts and taped brackets from the extension as shown.
-
Lay the oil shuttle flat on the floor or table.
-
Leaving the small bracket on the threaded studs spread the extension out and fit it over the spout of shuttle. Make sure the small bracket rests on the edge of the spout, and gasket fits along the top edge of the spout.
-
Determine which set of threaded stud the larger brackets fits. The brackets have a slight bow to them and must be installed on the correct side. The bend goes towards the inside of the shuttle.

-
Fit the larger brackets over the threaded studs. Make sure the notch in the larger bracket rests against the edge of the spout.

-
Thread the nuts (previously removed) onto the threaded studs and tighten with a 7/16” wrench or socket. When the nuts are tightened, the lower part of the bracket squeezes the spout of the shuttle, securing the extension in place.
The brackets and extension may need squeezed together with pliers or vise-grips to allow enough threads to show through to start nuts on threads of studs.
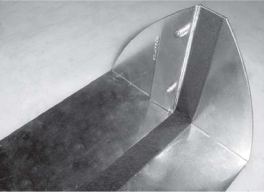
The shuttle is now ready for use.