All updates that are saved to a USB drive must be a .hpf file. Any standard USB Drive above 2 GB is apporved by Henny Penny to use in this unit to upgrade software.
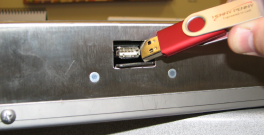
Locate the USB connector on the bottom of the unit. Slide the door back to access the connector.
Connect the USB drive into the connector. The display will automatically change. - The left display will read “SETP” and will light green. - The middle display will read “FLSH” and will light green. - The right display will read “EXIT” and will light red.
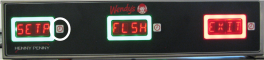
Press the timer button next to the middle display circled.
The display will read “NEXT” and show the new times.
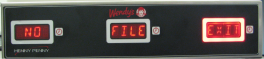
If the USB does not contain the correct file type (.hpt) or updates are found, this display will read “NO” “FILE” “EXIT”.
Pressing the timer button next to the left display that reads “NEXT” will show all the new updates available from oldest to newest.
Pressing either the timer button next to the middle or the right display will reflash the software and return to the previous screen.
Repeat this step for all updates.
Once all desired updates have been completed, press the timer button next the the left display until “EXIT” reads in the right display. Press the timer button next to the “EXIT”. This will take you back to the programming display shown in Figure 4-4.
It is now safe to remove the USB drive from the unit. Once the USB drive has been removed, the timer will automatically return to idle mode.