|
|
|
Quick Filtering

|
Overflow Risk Filter only when the oil temperature is less than |
-
Press and hold the Filter button (on either side) until “1.QUICK FILTER?” “YES NO” displays.
-
Choose one of the following:
-
If filtering is desired, press the Confirm button for YES and “DRAIN PAN READY?” “YES NO” displays.
-
If filtering is not desired, press the Cancel button and fryer resumes normal operation.
-
Ensure the filter pan is pushed into place, the filter pan cover is on pan, and press the Confirm button.
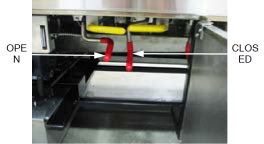
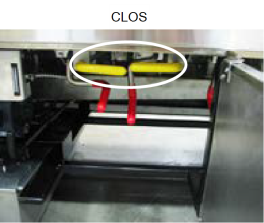
NOTE: Purge valves are available on select units for solid oil. Perform step 4 if purge valve is available, otherwise continue to step 5.
Purge Valve
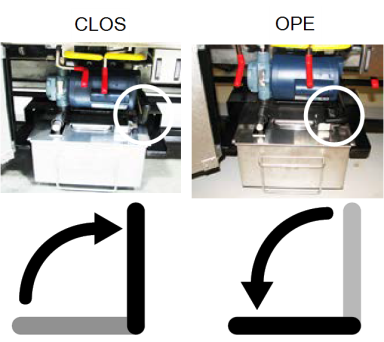
“CLOSE PURGE VALVE” followed by “CONFIRM” display. Turn the black purge valve handle to the filter (closed) position and press the Confirm button.
Press the Confirm button and “SKIM VAT” followed by “CONFIRM” “YES NO” display.
Skim crumbs off the top of the oil and then press the Confirm button for YES. *OPEN DRAIN* displays.
Drain Valve
Turn red drain handle to open drain. “DRAINING” displays and oil drains from the vat.
“VAT EMTY”, followed by, “CONFIRM” displays. Ensure drain is clear and vat is empty and then press the Confirm button.
Return Valve
“OPEN RETURN VALVE” followed by “CONFIRM” display. Turn the yellow return valve handle down to open valve & start pump and then press the Confirm button.
“WASHING” displays and filtering process begins.
Once control has completed the filtering process, *CLOSE DRAIN* displays. Turn red drain handle to close the drain.
“FILLING” displays and the vat re-fills with oil.
Once vat is filled, “IS POT FILLED” “YES NO” displays . Ensure vat is full and then press the Confirm button.
“CLOSE RETURN VALVE” followed by “CONFIRM” display. Allow oil to bubble for 10 to 15 seconds and then close the yellow return valve handle.
Press the Confirm button and the control returns to normal operation.
NOTE: Purge valves are available on select units for solid oil. Perform step 14 if purge valve is available.
“OPEN PURGE VALVE” followed by “CONFIRM” display. Choose one of the following:
If more vats need filtered, press the Confirm button, leave purge handle in the filter (closed) position, and repeat above steps.
If all vats have been filtered, open purge valve and press the Confirm button.
 | To avoid personal injury, do not move fryer or filter pan while containing hot oil. The filter pan must be as far back under fryer as it will go, and the cover in place. Be sure the hole in the cover lines up with the drain before opening the drain. |
| Slipping Hazard To avoid personal injury, do not exceed filter pan capacity. To avoid overfilling the filter pan, drain only 1 vat at a time. Make sure the floor area around equipment is completely clean and dry to avoid slip risks. |