|
|
|
Connecting to the Network
Within a few minutes after manually powering ON the fryer, the radio board will auto-connect to the network. The network WiFi connection is made using a radio board inside the fryer. By connecting to the network, such operations as monitoring how the equipment is operating or remotely uploading new cook settings can be performed. The status of these connections can be viewed and if there are issues with the connection, the radio can be rebooted.
Accessing Connection Information
-
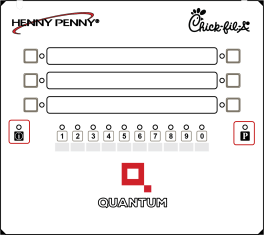
Press and hold the I (INFO) and P (Program) buttons at the same time to activate INFO Mode. Then, release the buttons.
-
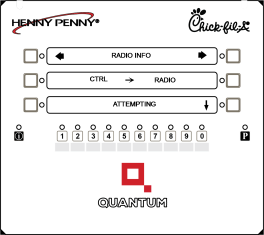
Press the left or right arrows to navigate to RADIO INFO.
-
Use the Up and Down buttons to view the information described below.
| RADIO INFO Item | Description |
|---|---|
| CTRL -> RADIO | Status of wired communication link between control and WiFi radio board. See the Viewing Control-to-Radio Communication Status section for more details. |
| WiFi SIGNAL | View a variety of information about the WiFi connection status on the radio board. See the Viewing WiFi Communication Status section for more details. |
| WAN IP ADDR | IP address that the radio uses to communicate on WiFi network. Hold button 1 to view the network name (SSID). |
| MAC ADDRESS | This is the unique WiFi hardware ID of the radio board. |
| APP VERSION | The version of the RIoT application software that runs on the radio board. |
| ROOT FS VER | Root File System version shows the date the operating system image was installed in the radio board. |
| RIOT CODE | This is the user code received from RIoT for this radio. |
| REBOOT RADIO? | Offers the option to reboot the radio board. See the Rebooting the Radio section for more details. |
Viewing Control-to-Radio Communication Status
The Control-to-Radio Communication displays the status of the wired communication between the fryer control board and the WiFi radio board.
-
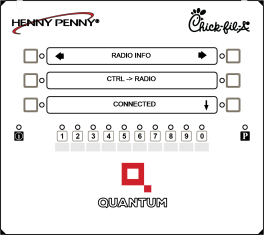
Use the right or left arrow buttons to navigate to CTRL -> RADIO.
-
View the connection status. Below are the status types and their descriptions.
| Status Type | Description |
|---|---|
| IDLING |
Control has not connected yet but will try again in a few seconds. |
| ATTEMPTING | Control is trying to connect to the radio. |
| NEGOTIATING | Control and radio are working to find the best connection option. |
| WAIT FRYER | This status is rarely seen because it happens quickly during the start of communication. The fryer control is setting up communication functions. |
| WAIT RADIO | The link is set up, and the control is waiting to start messaging. |
| CONNECTED | The control and radio can now send data to each other. This status is only about the wired connection between the control board and radio board. |
| ENDING |
The control and/or radio are shutting down the wired connection. If the radio is unplugged or rebooting and stops communicating, the control detects the loss and closes the link. This can also happen if there are major problems with the connection, so the system shuts it down and restarts. |
| DISCONNECTED | The control and radio are no longer communicating. This status is brief, as the control quickly returns to idle to get ready to reconnect. |
Viewing WiFi Communication Status
The WiFi Communication screen displays the radio's WiFi connection strength and other WiFi information. During normal operation, buttons 1-7 and button 10 are lighted.

-
From the RADIO INFO option, use the Up and Down arrows to select WiFi SIGNAL. The bottom display shows the signal strength of the WiFi signal being received by the radio.
-
Press button 10 to toggle between the signal strength text and the actual decibel-milliwatt value. These values are:
-
Press and hold buttons 1 - 7 to view additional information described below.
| Signal Strength Text | Signal Strength dBm Value |
|---|---|
| Excellent | signal >= -62 |
| Strong | -71 to -63 |
| Good | -77 to -72 |
| Poor | -82 to -78 |
|
Weak |
signal <= -83 |
| Button | Description |
|---|---|
| 1 |
LINK QUALITY - displays the link quality percentage. Link quality shows how good the WiFi signal is sending and receiving data. A higher link number means a better connection. |
| 2 | LINK SPEED - displays the link speed of how fast data can move between the radio and WiFi access point. A higher number means faster speed. |
| 3 | TX POWER - displays transmission power (signal strength). The transmission signal strength shows how strong the radio's signal is when sending data to the Access Point. The radio adjusts the strength automatically. A low number means the access point is close, while a high number indicates it is farther away or there is more interference. |
| 4 | CHAN FREQ - displays channel frequency. This is the radio frequency that the radio is using to communicate with the Access Point. |
| 5 | AP MAC ADDR - displays the MAC address of the access point the radio is using. It is a unique number that identifies the WiFi device. |
| 6 | AP SSID - displays the Service Set ID (SSID). This is the name of the WiFi network the radio is currently connected to. |
| 7 | PING - shows the network connectivity to the internet. Every eight seconds, the radio sends five test messages to a web server and checks if they reach the server and get a reply. The LOST [%] shows the percentage of failed tests. |
Rebooting the Radio
When necessary, the radio can be completely restarted (rebooted) if the fryer control and radio are properly communicating. Rebooting the radio can be necessary to improve your WiFi connection.

-
From the RADIO INFO option, use the Up and Down arrows to navigate to REBOOT RADIO?
-
Press and release button 1. This will initiate a complete reboot.
-
The reboot may take 60 seconds for communication to be restored. During this time, the control may briefly display WAIT RADIO, ENDING, IDLING, and ATTEMPTING while it re-establishes communication between the radio and fryer control.