Stacking and Outboard Caster Installation

|
This fryer must be installed and used in a way that water does not contact the oil which can cause splashing and boiling over of oil and steam leading to personal injury; excludes normal product moisture. Burn risk! Do not move the fryer or filter drain pan while containing hot oil. Personal injury or serious burns can result from splashing hot oil. |
|
|
Heavy Object Take care when moving the fryer to prevent personal injury. The rotisserie weighs approximately: SCR 6 380 lbs (172 kg) SCR 8 500 lbs (230 kg) |
-
Using a crosshead screwdriver, remove the 8, 1/4-20 x 1 in. screws in the corners of the unit.
-
Remove all contents from inside of unit. Carefully lay the unit over onto the customer side of the unit. Be sure to protect the glass door from damage, such as placing packing material between unit and a wood pallet. (If the door on the customer side has a handle on it, allow the door handle to hang over the edge to the wood pallet.)
-
Using a 7/16 in. wrench or socket, remove the bolts, washers and lockwashers from the bottom of the unit.
-
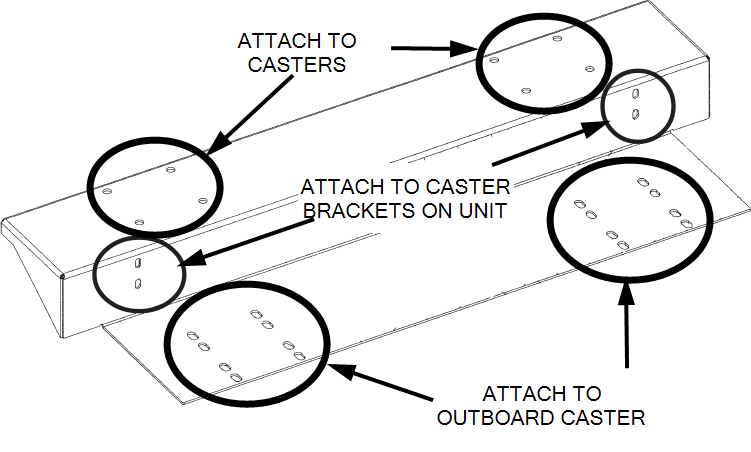
Using the hardware removed in step 3, and the caster mounting holes in the bottom of the unit, fasten the outboard caster brackets to the bottom of the unit, along with the stacking spacer, if present. (The stacking spacer should be on the customer side of the unit.)
-
Then, using 8, 1/4-20 x 1 in. screws (from step 1) fasten the caster brackets to both sides of the unit.
The brackets can be used on either side, thus the 16mounting holes in the bracket.
-
Attach casters to the caster bracket, mounting the two locking swivel casters to the control side of the unit and the non-locking casters to the customer side. Use the 5/16 inch hex head bolts, 5/16 inch locking washers, 5/16 inch nuts and 5/16 inch flat washers (use 2 flat washers per bolt; one on the bottom side of caster bracket and one on the top-side) which are provided. Completed caster installation shown below.

-
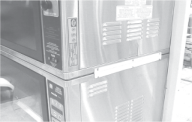
Set the unit onto its casters and carefully lift the rotisserie and place it on top of the display, or bottom rotisserie, with the controls on the same side.
-
Remove the three side panel screws from the top unit and remove the three top side panel side screws from the bottom unit.
-
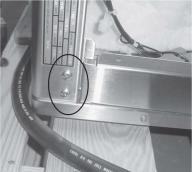
Mount the stacking brackets to each side of the units as shown using the screws removed in step 7.
Unit is now ready for use.