Connecting the Fryer to Wi-Fi
IMPORTANT! Applies to countries where Henny Penny connectivity is available.
Connecting the fryer is similar to connecting a phone or tablet. If you have ordered a new fryer, your local Henny Penny distributor will attempt to get your fryer connected during the scheduled fryer startup.
NOTE: The HENNYLINK™ portal email sent to the owner / operator or admin for your HENNYLINK™ portal account must have the user license agreement checked, before data will show up in the HENNYLINK™ portal dashboard.
Step 1: Enable Wi-Fi.
-
Tap Menu.
-
Tap Advanced.
-
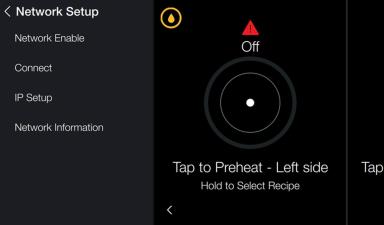
Tap Network Setup.
-
If your fryer Does Not use the 6-digit pin, enter the Manager code: 1234.
-
If your fryer uses the 6-digit pin, enter the 6-digit Network Setup Passcode. This code was provided during Installation and Start-Up.
-
If the Network Setup Passcode is lost, it's documented on a label inside the far left door.
-
The Network Setup Passcode also displays during a Factory Reset.
-
The below image is an example. Your Fryer Pin (Network Setup Passcode) may be different.
-
For more information on connectivity features of your fryer, scan the QR code.
-
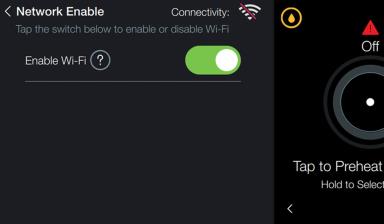
Slide Network Enable (turns green). Wi-Fi icons you’ll see:
-
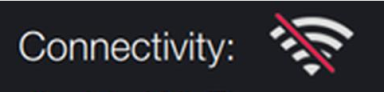
Wi-Fi with a red line: Wi-Fi is ON but not connected yet (expected at this point).
-
Wi-Fi without a red line: Wi-Fi is ON and connected. Continue to step 6 when red line disappears.
-
-
Tap the back arrow, then tap Network to continue.
Note: the below image is an example. Your code may be different.

IMPORTANT:
Note:

Step 2: Connect to Your Restaurant’s Network.
-
Tap Network Setup.
-
Tap Connect.
-
Pick your restaurant’s Wi-Fi from the list.
-
Aim for a signal strength between 0 and –80 dBm.
Tip: Avoid “guest Wi-Fi” that requires a web browser sign-in.
-
If your network isn’t listed, choose Type Network Name and enter:
-
Network name (e.g., Wi-Fi Network).
-
Security type (e.g., WPA-PSK).
-
Password (Use the on-screen keyboard. The Shift key—up-arrow icon—switches upper / lowercase.).
-
Step 3: Confirm Network Details.
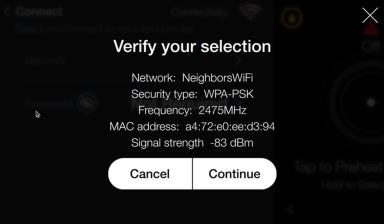
You’ll see:
-
Network name
-
Security type
-
Frequency
-
MAC address
-
Signal strength
If correct, tap Continue.
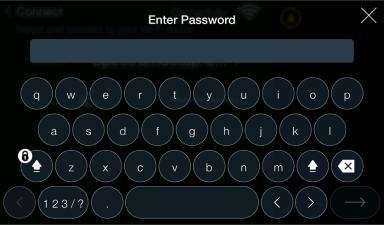
Step 4: Enter the Wi-Fi Password.
Type your password (use Shift for uppercase).
Tap Confirm. A spinning wheel appears next to Connectivity as it connects. When connected, the Wi-Fi icon displays without a red line.
Step 5: Verifying You Are Fully Connected (Wi-Fi + Cloud + ULA).
NOTE: Being connected to Wi-Fi does not automatically mean data is flowing to HENNYLINK™ portal dashboard.
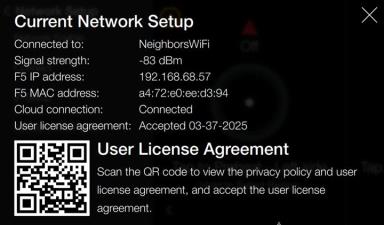
Check the fryer’s status: Tap Menu > Advanced > Network Setup > Network. Information You’ll see:
-
Network Name: the Wi-Fi Network you’re on.
-
Signal Strength: aim for a signal strength between 0 and –80 dBm.
-
IP Address: if blank, the fryer isn’t talking to the network.
-
MAC Address: used for whitelisting if your network requires it.
-
Cloud Connection: Connected vs. Not Connected.
-
User License Agreement (ULA): Accepted or Not Accepted.
Data Flow
Data will flow to HENNYLINK™ portal only when all three things are true: